
Last updated October 17, 2026
DIY vs Professional Insulation: The San Jose Homeowner’s Decision Guide
Home Depot rents a blown insulation machine for free when you buy 10 bags of insulation. The machine works fine. The problem is that in California, any insulation project that triggers a Title 24 compliance certificate, which includes most replacement jobs on permitted homes, legally requires that certificate to be signed by a licensed contractor. A DIY attic job in San Jose may be physically identical to a pro job and still be non-compliant on paper, which matters when you sell. This guide walks through the legal triggers, the honest math, the failure modes nobody blogs about, and the handful of jobs you should never touch yourself. For related reading, see our more guides & resources.
Quick Answer
In San Jose, small DIY insulation jobs like adding batts over an existing attic floor or air-sealing around penetrations can be legal and cost-effective if done correctly. But any project that adds square footage, alters building envelope components, or requires a Title 24 compliance certificate, including most blown-in retrofit jobs where you remove old material, legally requires a California C-2 licensed contractor. See How to Hire a Insulation Contractor in San Jose: A Step-by-Step Guide for help choosing one. Spray foam, asbestos-suspect removal, and fire-rated assembly work are never DIY territory.
Table of Contents
- What California Law Says About DIY Insulation
- The Honest Cost Breakdown: DIY vs Pro in San Jose
- The Four DIY Failure Modes Nobody Warns You About
- Jobs That Are Never DIY Territory
- The Hybrid Option: DIY Air Sealing Plus Pro Installation
- Materials, R-Value, and What Actually Works in San Jose’s Climate
- Permits, Rebates, and Insurance: What DIY Can Cost You Later
- Common Mistakes to Avoid
- When to Call a Professional
What California Law Says About DIY Insulation
California is stricter about insulation work than most states, and San Jose enforces the state’s Title 24 energy code with particular seriousness. Title 24, formally the California Code of Regulations Title 24 Part 6, requires that when certain insulation work is done on an existing home, the finished job carries a Certificate of Compliance signed by a licensed contractor. That certificate becomes part of the home’s permanent record. When you sell, the buyer’s home inspector may ask for it. If you don’t have it, you’ve created a disclosure problem and potentially a code compliance problem, which can stall escrow or knock down your sale price.
The practical breakpoint is this: adding insulation on top of an existing attic floor without disturbing anything else is generally considered maintenance and remains DIY-eligible. But once you remove old insulation, alter the building envelope’s air barrier, or touch anything that affects the home’s heating and cooling load calculations, you’ve crossed into Title 24 compliance territory. That includes the majority of blow-in retrofit jobs where old material comes out first.
Here’s the specific legal picture for San Jose homeowners:
- DIY-eligible under California law: Adding batt insulation over existing attic floor insulation, caulking and foam-sealing penetrations, installing outlet gaskets, weatherstripping attic hatches and doors.
- Requires a licensed contractor: Any job that triggers a Title 24 compliance certificate, including most blown-in installations where old material is removed, any spray foam application, and any work involving fire-rated assemblies.
- The insurance angle: If you DIY a job that should have had a contractor-signed certificate and something goes wrong, a related fire, a moisture problem, or a failed inspection at sale, your homeowner’s insurance may decline coverage for damage connected to the unpermitted or non-compliant work. We’ve watched this play out in San Jose. It’s not hypothetical.
- Rebate programs: PG&E and BayREN insulation rebate programs, both available to San Jose homeowners, require a licensed contractor’s invoice and permit documentation. A DIY job gets you zero rebate dollars.
The takeaway: the legal line between DIY and pro insulation work in San Jose is not about skill. It’s about the paper trail. You can be perfectly capable of running a blower machine and still not legally allowed to self-perform the job on your own home. That’s the part most YouTube tutorials never mention.
The Honest Cost Breakdown: DIY vs Pro in San Jose
Let’s put real numbers on a typical San Jose attic: 1,200 square feet of attic floor space, currently at R-19 fiberglass batts, targeting R-38 code minimum for the San Jose climate zone (Zone 3C). We’ll compare a DIY blown fiberglass job against a professional quote from Attic Insulation in San Jose. Both jobs assume the old insulation stays in place and new material is blown on top.
DIY material costs, priced at San Jose Home Depot and Lowe’s as of this year:
- Blown fiberglass or cellulose: $600 – $800 for enough bags to bring 1,200 sq ft from R-19 to R-38
- Blower rental: Free with 10+ bag purchase, otherwise $40 – $50 per day
- PPE and misc supplies: $40 – $70 (goggles, N95 respirator, knee pads, utility knife)
- Baffle materials if needed: $30 – $60
- Your time: 6 – 10 hours for two people, assuming no surprises
Total DIY out-of-pocket: $670 – $980. Plus your weekend.
The professional quote for the same scope in San Jose typically runs $1,400 – $1,900. That includes air sealing of the major bypasses, baffles where needed, material, labor, cleanup, and the Title 24 compliance documentation. The gap between DIY and pro is roughly $500 – $1,200. For a detailed breakdown, see our Insulation Cost Breakdown: The San Jose Homeowner’s Reference for 2026.
But here’s the line item that shifts the math: if your attic has old insulation that needs removal first, DIY disposal fees at the San Jose Zanker Road transfer station run $150 – $300 depending on volume and material type. A pro quote for removal and disposal is often only $400 – $600 more than a blow-on-top job. Once you factor in disposal, the DIY savings shrink to a few hundred dollars, and you’ve also inherited the asbestos testing question if the house predates 1980.
We’re not going to pretend DIY is never worth it. Adding unfaced batts on top of an existing attic floor in a 1990s Almaden Valley tract home, where the attic is open and easy, can save a handy homeowner real money. The problem is that San Jose’s older housing stock, think Willow Glen bungalows, Rose Garden foursquares, and Cambrian ranches, rarely has a clean, empty attic ready for fresh material. Those homes carry decades of roof leaks, old wiring, and previous owners’ shortcuts, which is where the failure modes below come in.
The Four DIY Failure Modes Nobody Warns You About
Most how-to guides show you a clean, empty attic and a happy person running a blower. Real San Jose attics look nothing like that. Here are the four ways DIY attic insulation jobs quietly go wrong, and what each one costs to fix later.
- Blocking eave baffles and creating moisture damage. Eave vents are designed to pull air from outside up through the attic and out the ridge vent. When blown insulation buries the soffit vents, air stops moving. Condensation forms on the underside of the roof sheathing in winter. In North San Jose and Berryessa homes with shallow roof pitches, we’ve pulled back insulation and found black sheathing, which is the early stage of rot. The fix requires pulling back material, installing baffles, and re-blowing. A $1,200 DIY savings turns into a $3,000+ repair.
- Installing below code depth because settling wasn’t accounted for. Blown fiberglass and cellulose both settle. Fiberglass settles about 10 – 15% in the first year. Cellulose settles up to 20%. If you buy exactly enough bags to hit R-38 at the listed coverage rate, without adding a settling allowance, you’ll be at R-33 or R-34 a year later. The Title 24 inspector knows this. So does the buyer’s home inspector. The formula is: target depth plus 15% extra material minimum. Most DIYers buy exactly the square footage the bag says.
- Skipping attic bypasses around light fixtures and top plates. Insulation slows heat transfer. It does not stop air movement. The air leaks in your attic, around recessed light housings, where interior walls meet the ceiling, around plumbing vent stacks and flue penetrations, move more conditioned air out of your house than any amount of insulation will ever save. A pro job includes air sealing as part of the scope. A DIY job where someone just blows fiberglass over existing leaks is stacking insulation on top of a hole in your thermal envelope. You’ll spend money and notice almost no change in comfort or energy cost.
- Triggering a failed home inspection at point of sale. This is the one we see most often in San Jose, because San Jose real estate moves fast and inspectors are thorough. A homeowner does a DIY job five years before selling. The attic looks fine. Then the buyer’s inspector flags insufficient depth, missing baffles, or insulation touching a non-IC-rated can light, which is a fire hazard as written. The seller is now negotiating a credit or a repair during escrow, which is the most expensive time to do anything. What cost $700 five years ago now costs $1,800 in an escrow repair, plus the hassle.
Jobs That Are Never DIY Territory
Some insulation work is beyond the reach of even a very capable homeowner, not because of skill, but because of safety, code, and chemistry.
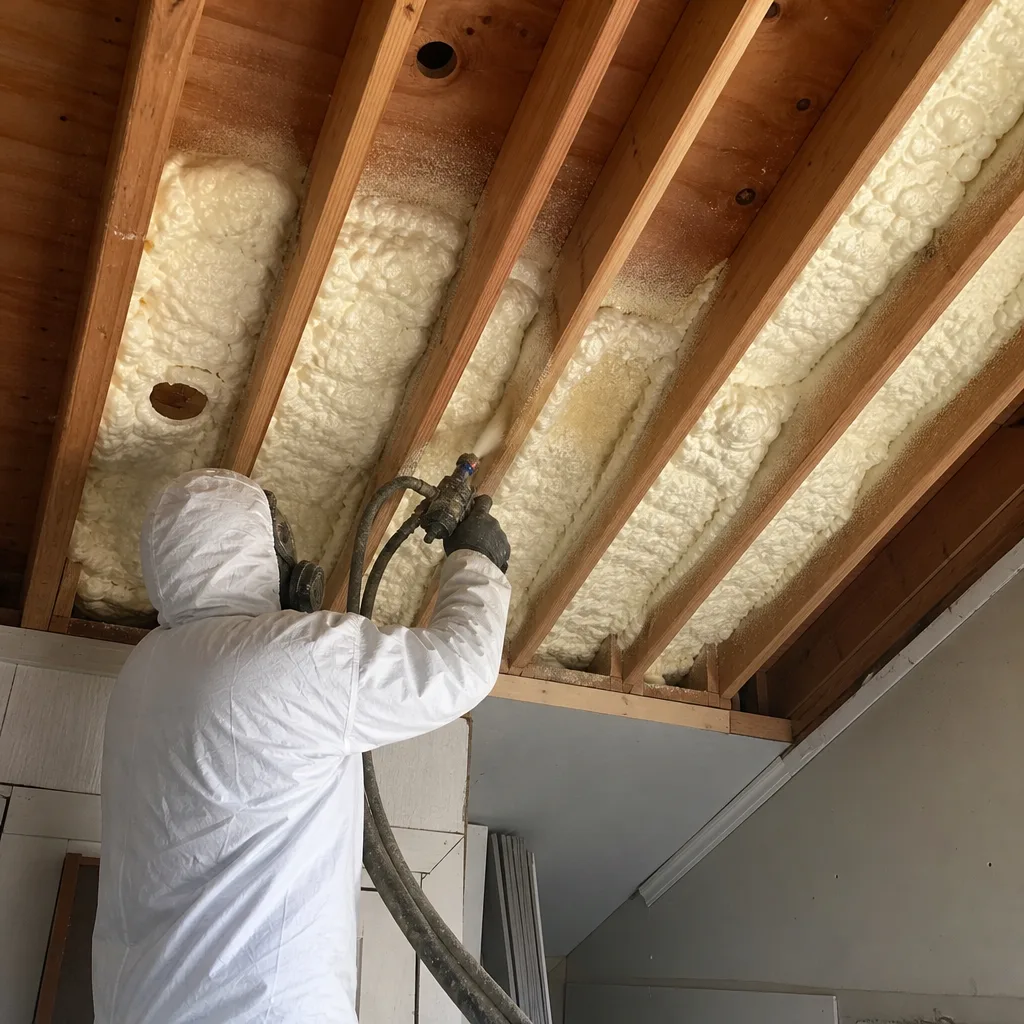
Spray foam is a hard no. The chemistry is unforgiving. Two-part spray foam, open-cell or closed-cell, requires precise temperature and humidity control. San Jose’s coastal influence keeps relative humidity above 80% on many nights, especially in neighborhoods like Alviso and along the Guadalupe River corridor. When spray foam is applied in humidity above 80%, the chemical reaction pulls water into the foam. The result is a foam that never fully cures, off-gasses for months, and may delaminate from the substrate. It can’t be fixed by re-blasting. It has to be scraped out. Beyond the chemistry, spray foam application requires full-face supplied-air respirator PPE, or the isocyanates will sensitize your lungs, and there is no home-gamer version of that gear. Even the rental shop won’t rent you a two-component spray foam rig for good reason. Laurel uses Spray Foam Insulation in San Jose equipment operated by trained technicians, and the material brands, including Icynene and Demilec, are matched to the application and climate.
Old insulation removal with suspected asbestos is a hard no. If your San Jose home was built before 1980 and has vermiculite insulation, which looks like small pebbles with a metallic sheen, it may contain asbestos. The only responsible move is to have it tested. If it tests positive, abatement requires a licensed remediation contractor, containment, negative air pressure, and disposal at a certified facility. The Zanker Road transfer station will not accept asbestos material from a homeowner for this reason. The state will fine you if you try to sneak it in. Asbestos abatement in San Jose runs $3,000 – $8,000 depending on attic size and material volume. That’s the cost of doing it right. It is not optional.
Any work touching fire-rated assemblies is a hard no. In San Jose, townhomes, condos, and many newer single-family homes built under the current California Building Code have fire-rated ceilings and fire separation walls. If your attic shares a wall with a neighbor, as it does in many Japantown and Downtown San Jose stacked units, that wall assembly has a specific fire rating. Disturbing its insulation without understanding the assembly’s construction can compromise the rating. Fire marshals do not care that you read a forum post.
Any job where you’re not comfortable in the space. Attics in San Jose summers reach 130°F and higher. Roof pitches at 4/12 or steeper mean you’re crawling on joists, not standing. The heat, the lack of light, the fiberglass dust, and the confined space create a hazard for anyone, but especially for homeowners who don’t do this regularly. If you’re not confident moving around your attic without stepping through the ceiling, the savings are not worth the risk of an ER visit or a ceiling patch. Call a professional.
The Hybrid Option: DIY Air Sealing Plus Pro Installation
Here’s the option most comparison articles skip, and it’s genuinely the smartest path for many San Jose homeowners: do the air sealing yourself and hire a pro for the insulation. Air sealing is low-risk, legally DIY-eligible, and it’s the part of the job with the biggest comfort return per dollar. Insulation installation, by contrast, is where the legal and physical risk concentrates. Splitting them gets you most of the DIY savings and none of the non-compliance downside.
Here’s what a homeowner can realistically seal themselves, with specific materials and what to expect:
- Foam can sealing around penetrations: Use Great Stuff or similar expanding foam around plumbing vent stacks, electrical wire penetrations, and HVAC line sets where they pass into the attic. One can covers a surprising amount of territory. Cost: $8 per can. Stop using the product when your hands are sticky and you’ve sealed the worst dozen holes.
- Outlet gaskets on exterior walls and ceiling fixtures: Foam gaskets behind outlet and switch cover plates, on interior walls below the attic, seal a meaningful amount of leakage. Cost: $10 – $20 for a pack of 10. In a 1960s Cambrian ranch, ceiling light boxes are often the leakiest spots in the house.
- Weatherstripping the attic hatch or pull-down stair: A pull-down attic stair in an Evergreen home can leak as much air as a window left half-open all year. Foam weatherstripping around the frame, plus an insulated cover box on the attic side, takes one afternoon. Cost: $40 – $70 for the weatherstripping and a basic insulated cover.
- Foam backer rod around recessed can lights: If your can lights are IC-rated, you can foam around the housing from above. If they’re not IC-rated, do not insulate within 3 inches of the fixture, and handle that as part of the pro scope.
Doing this work before the insulation contractor arrives reduces the pro’s scope, which reduces the quote. It also means the insulation goes onto a properly sealed envelope, so the R-value you’re paying for actually performs. When you call for a quote, tell the contractor what you’ve sealed and what you haven’t. A good contractor will ask. If they don’t, that’s a red flag.
Materials, R-Value, and What Actually Works in San Jose’s Climate
San Jose sits in California climate zone 3C, which is a marine-influenced, mixed-dry climate. That means hot, dry summers; mild, sometimes damp winters; and a diurnal temperature swing that can exceed 30 degrees in the summer, 90 during the day, 58 at night. The insulation strategy that works here is ceiling-first, because the attic is where the house gains the most heat in summer and loses the most in winter. California’s current code floor for new construction in San Jose is R-38 for attics, but many homes built between 1965 and 2005 in neighborhoods like Blossom Valley and Almaden sit at R-19 or R-11. Bringing those attics to R-38 is the single highest-ROI energy upgrade available to a San Jose homeowner.
The term you need to know is R-value, which measures how well insulation slows heat from moving through your ceiling. Higher R-value means more resistance. R-38 means the material, at installed depth, resists heat flow at a rate of 38 per the standard test. Just as important is the air barrier, which is the physical layer that stops conditioned air from leaking into the attic. Insulation slows heat transfer. It does not stop air movement. A house needs both.
For a San Jose attic, the material choices break down like this:
- Fiberglass batts (Owens Corning, CertainTeed, Johns Manville): The workhorse. Easy to handle, cheap per R-value, but prone to gaps around framing if installed hastily. Good for DIY topping-off jobs.
- Loose-fill fiberglass: Blown in with a machine, fills around obstructions. Better coverage than batts, settles about 10 – 15%.
- Loose-fill cellulose (GreenFiber): Made from recycled paper with borate treatment. Slightly higher R-value per inch than fiberglass, better at slowing air movement, settles about 20% without proper fluffing.
- Spray foam (Icynene, Demilec): The only option that insulates and creates an air barrier in one step. Appropriate for specific San Jose applications, cathedral ceilings, unvented roof assemblies, and sealed attics, but installation demands training and strict environmental control.
The right choice depends on your attic’s geometry, your home’s age, and whether you have vented or unvented construction. In a 1990s San Jose tract home with a standard vented attic, blown-in fiberglass or cellulose to R-38 is almost always the best value. In a 1950s Ranch with spaghetti wiring and no attic access, spray foam might be the only practical way to hit code numbers. Laurel Attic Insulation San Jose home assessments start with an attic inspection specific to your home, not a generic recommendation.
Permits, Rebates, and Insurance: What DIY Can Cost You Later
The Title 24 compliance certificate isn’t a permit, exactly, but it functions like one when the home sells. When a licensed contractor self-certifies a job under Title 24, the certificate goes into the building record. A DIY job has no certificate because the homeowner cannot lawfully sign one. If the buyer’s inspector flags the work, the seller has no paper stand on. We’ve watched this specific scenario cost San Jose sellers more than the original insulation job would have cost if done by a licensed contractor in the first place.
Then there’s the rebate angle. San Jose homeowners have access to two active programs: PG&E’s Energy Savings Assistance and the BayREN Home+ program administered by the Association of Bay Area Governments. Both offer insulation rebates, and both require a licensed contractor’s invoice as proof of work. The BayREN rebate for attic insulation in the San Jose area typically runs $0.15 – $0.25 per square foot depending on final R-value and the home’s eligibility. On a 1,200 sq ft attic, that’s $180 – $300 back. A DIY job qualifies for none of it. When you subtract the rebate a pro job would have earned, the real cost gap between DIY and pro shrinks to a couple hundred dollars on many San Jose attics.
Insurance is the sleeper risk. Homeowner’s insurance policies contain a clause, usually under the heading “Concealment or Fraud,” that allows the insurer to deny claims related to unpermitted or non-compliant work on the home. A DIY insulation job that doesn’t have a compliance certificate is, by definition, non-compliant if the scope required one. If that attic later develops a moisture problem connected to blocked vents, or if a fire starts at a recessed can light that was improperly insulated around, the insurer has grounds to deny the claim. The insurance company doesn’t have to prove the DIY job caused the problem in a forensic sense. They only have to show the work was non-compliant and the claim arose in or near the non-compliant area. That’s a low bar.
The practical takeaway for San Jose homeowners: if your insulation job is the kind that legally requires a contractor, the contractor’s price includes more than labor and material. It includes the compliance paper that protects your home’s marketability, your insurance coverage, and your access to the rebate programs you’re already paying into through your PG&E bill.
Common Mistakes to Avoid
- Blowing insulation over old, rodent-infested material. San Jose attics host rats and mice, especially in older East Side and Willow Glen neighborhoods. Insulating over rodent droppings and urine-soaked material seals the contamination in and makes Insulation Removal in San Jose more complicated later. Remove, clean, and sanitize first.
- Using faced batts as a second layer. The kraft paper facing on batt insulation is a vapor retarder. If it faces upward into the attic, it traps moisture against the drywall below, and you’ll see brown staining on the ceiling within a couple of years. Unfaced or blown is correct for a second layer.
- Ignoring the attic access hatch. The hatch is part of the attic’s thermal boundary. An uninsulated, unsealed hatch in a San Jose home loses as much conditioned air as a small window, and its pull-down stair frame is usually the single biggest air leak in the attic.
- Assuming more insulation always helps. Beyond a point, the law of diminishing returns kicks in. In San Jose’s Climate Zone 3C, the cost-per-comfort-savings curve flattens hard above R-49. Spending extra to go from R-38 to R-60 yields very little in this climate compared to sealing air leaks.
- Not testing for asbestos before disturbing old vermiculite. Pre-1980 San Jose homes have vermiculite more often than homeowners realize. The test costs $75 – $150 at a Bay Area environmental lab. The cost of skipping it can be six figures if asbestos fibers spread through the living space during a DIY removal.
- Buying the cheapest bags on the shelf without checking coverage charts. Coverage rate, not price per bag, is the number that matters. A cheap bag with poor coverage may cost more per installed R-value than a mid-priced bag. Read the square footage at your target R-value and do the math.
When to Call a Professional
Call a professional when the job legally requires one: blown-in retrofits with removal, spray foam, any asbestos-suspect material, any fire-rated assembly work. Call a professional when the attic has moisture damage, rodent issues, or inaccessible spaces that need special equipment. Call a professional when you’re not confident working in the heat and confined conditions of a San Jose attic in August. And call a professional when you want the compliance paper, the rebate eligibility, and the insurance protection that DIY can’t provide. Laurel Attic Insulation San Jose offers free estimates in San Jose. Call (669) 333-7274 and a live person answers, 24/7.
Frequently Asked Questions
Yes, for small jobs like adding batts over existing attic insulation or air sealing, which remain DIY-eligible in San Jose. But if the work triggers Title 24 compliance, including most removal-and-replace blow-in jobs, California law requires a licensed contractor to sign the compliance certificate. DIYing a job that legally required a contractor can void insurance coverage for related damage and can surface as a problem at point of sale.
A typical professional attic insulation job in San Jose, bringing a 1,200 sq ft attic to R-38 with air sealing included, runs $1,400 – $1,900. A DIY version of the same scope runs $670 – $980 in materials and rental, plus your time and disposal fees if old material comes out. The gap narrows further once you account for rebates a pro job qualifies for and the compliance documentation a DIY job can’t produce. Call (669) 333-7274 for an exact quote, estimates are free.
No. DIY spray foam kits expose the user to isocyanates, which require supplied-air respirator protection you can’t rent at a hardware store. The two-part chemistry also fails when relative humidity exceeds 80%, which happens regularly in San Jose’s coastal-influenced microclimates. Improperly cured foam can off-gas for months and must be scraped out to fix. Spray foam is a professional-only product, period.
Current California code requires R-38 for attics in San Jose’s Climate Zone 3C. If your home was built between the 1960s and early 2000s, your attic may be sitting at R-11 or R-19. Bringing it to R-38 is the highest-ROI energy upgrade most San Jose homeowners can make, and air sealing the attic is a close second.
It can, if the job legally required a contractor’s compliance certificate and you didn’t have one. Most homeowner’s policies allow the insurer to deny claims related to non-compliant work. A moisture problem or fire connected to a DIY attic job becomes a coverage question. A licensed contractor’s job comes with the paper that keeps your claim clean.
Yes, and it’s the smartest split for many San Jose homeowners. Air sealing around penetrations, attic hatches, outlet gaskets, and recessed can lights is DIY-friendly and moves the comfort needle more than most people expect. Do that first, then get a professional quote for the insulation itself. You’ll reduce the pro’s scope and the insulation will perform measurably better because it’s going onto a sealed envelope. Call (669) 333-7274 to talk through the split, we’ll tell you honestly what’s worth doing yourself.
The Bottom Line
The DIY-vs-pro insulation decision in San Jose is not just a money question. It’s a code question, an insurance question, and a home-sale question with a dollar figure attached to each answer. DIY works for the right homeowner in the right attic: an accessible, modern attic with no removal required, no rodent contamination, and no spray foam involved. Do the air sealing yourself, add batts if the space cooperates, and call a licensed contractor for everything else. The paper trail matters. The rebates matter. And in a city where heat waves arrive faster and stay longer each year, an attic done wrong costs more than an attic done twice. Make the call that fits your attic, your skill set, and your home’s future sale. If you want an honest assessment of what your attic actually needs, call Laurel Attic Insulation San Jose at (669) 333-7274. A live person picks up, every time, day or night.
Written by Chase Whitaker, Owner at Laurel Attic Insulation San Jose, serving San Jose since 2003.