
Last updated October 17, 2026
The Complete Guide to Insulation in San Jose
Most insulation guides are written for Minneapolis or Atlanta. San Jose sits in IECC Climate Zone 3C, a coastal-influenced zone so mild that the DOE’s own recommendations differ from colder California cities by a full R-value tier. Yet nearly every contractor in town installs to generic “California code” without adjusting for what actually happens inside a San Jose attic in August or January. This guide explains what Zone 3C means for your house, what it should cost, which materials actually make sense here, and the step most contractors skip that quietly wastes 30 to 40 percent of whatever you pay for. You’ll finish with a clear picture of what proper insulation looks like in San Jose, not in a generic national blog post. For more guides & resources, visit our blog.
Quick Answer
Insulation in San Jose should be chosen for IECC Climate Zone 3C, which calls for R-30 to R-49 in attics, R-13 to R-15 in walls, and R-19 in crawl spaces; most homes in San Jose are under-insulated to R-19 or less in the attic. A full attic insulation job in San Jose typically runs $900 to $2,400 depending on square footage and material-see our full Insulation Cost Breakdown: The San Jose Homeowner’s Reference for 2026 for details-and the single highest-impact step is air sealing before insulation goes in, which most contractors skip entirely.
Table of Contents
- What Climate Zone 3C Actually Means for San Jose
- The Three Insulation Problems Unique to San Jose
- The Four Main Insulation Types Compared in San Jose Dollars
- Air Sealing: The Step Most San Jose Contractors Skip
- R-Value Explained Without the Jargon
- What Insulation Costs in San Jose in 2026
- Three Questions to Ask Before Signing Any Insulation Contract
- What to Check Yourself vs. What Needs a Pro
What Climate Zone 3C Actually Means for San Jose
San Jose falls into IECC Climate Zone 3C, and that “C” changes everything. The C stands for coastal influence, specifically marine air that moderates temperature swings. Unlike inland zones where attics bake to 140 degrees all summer and freeze all winter, Zone 3C attics see intense heat from roughly May through October, then mild but damp conditions from November through April. The summer heat and the winter moisture each create a different insulation problem, and solving one without thinking about the other leads to mold, high bills, or both.
The Department of Energy’s Zone 3C recommendations are specific. For attics, DOE calls for R-30 to R-49. For walls, R-13 to R-15. For crawl spaces, R-19. Here’s the reality in San Jose: most homes built before 1990 have R-19 or less in the attic, sometimes as little as R-11. That means a huge share of houses in neighborhoods like Willow Glen, Rose Garden, Almaden Valley, and Evergreen are running at half or less of what the DOE recommends. Homes built after 2010 are usually closer to code, but even those often have gaps around attic hatches, recessed lights, and plumbing penetrations that effectively drop the real-world R-value well below the labeled number on the bag.
A key point most San Jose homeowners miss: R-value requirements are a floor, not a ceiling. The Zone 3C minimum for an attic is R-30, but going to R-49 rarely costs double. It costs maybe 30 to 40 percent more in material and labor while cutting attic-driven heat gain by an additional third. In a San Jose summer where July days routinely hit the mid-90s, that difference shows up on your cooling bill and in how your upstairs rooms feel at 6 p.m.
The Three Insulation Problems Unique to San Jose
National insulation guides treat summer and winter as opposite problems solved by the same fluffy stuff. San Jose is different-see our DIY vs Professional Insulation: The San Jose Homeowner’s Decision Guide for help deciding how to proceed. Here are the three issues we see most in this market, and how they should shape your insulation choice.
1. Summer Radiant Heat from Tile Roofs
Tile roofs are everywhere in San Jose, and they do something surprising: they store heat. Concrete and clay tiles soak up direct sun all day and then radiate it downward into the attic for hours after the sun goes down. A dark tile roof over a lightly insulated attic can keep attic temperatures above 120 degrees well into the evening, which means your air conditioner keeps cycling even after outdoor temps drop. The right insulation for this problem is high R-value plus proper ventilation, not just more fiberglass. Blown cellulose and spray foam both perform better than batts at slowing radiant heat transfer, because they fill the cavity completely without the gaps and seams that batts leave behind.
2. Winter Moisture from Rain-Soaked Attics
San Jose winters are wet, not freezing. From December through March, rain and morning fog push moisture into attics through roof penetrations, poorly sealed vents, and even through the building envelope itself. When warm indoor air leaks into a cold, damp attic, the moisture condenses on the underside of the roof deck and on insulation itself. Fiberglass batts lose R-value when they get damp, and they hold that moisture against wood framing. This is why we see mold patterns in San Jose attics that would shock a contractor from Phoenix. The fix is two-part: air seal the attic floor so moist indoor air can’t get up there, and choose insulation that resists moisture. Rockwool and closed-cell spray foam both shed water better than fiberglass, which is one reason we often recommend them for San Jose attics with existing moisture issues.
3. Wildfire Smoke Infiltration Through Unsealed Bypasses
San Jose sits in a wildfire-risk region, and even when flames are miles away, smoke travels. During the 2020 fire season, San Jose saw weeks of hazardous air quality, and homeowners discovered something important: insulation alone does not stop smoke. Smoke particles enter through the same bypasses that let heat escape: gaps around recessed lights, plumbing chases, wiring holes, and attic hatches. Air sealing closes those pathways. A properly sealed attic reduces smoke intrusion by blocking the pressure-driven flow of outdoor air into living spaces. This is a San Jose-specific concern that no generic guide mentions, and it’s a big reason we treat air sealing as non-negotiable on every attic insulation job in San Jose, not as an optional add-on.
The Four Main Insulation Types Compared in San Jose Dollars
Here’s the honest breakdown of what material options actually cost in San Jose, installed. Prices vary by square footage, access, and existing conditions, but these ranges reflect real market pricing we see in this area.
| Material | Installed Cost per Sq Ft | Best For | San Jose-Specific Note |
|---|---|---|---|
| Fiberglass batts | $1.50 – $2.50 | Open attics with easy access | Cheapest, but loses R-value when damp; poor fit around odd framing |
| Blown cellulose | $2.00 – $3.50 | Attics with irregular joist spacing | Dense pack resists air movement; better moisture control than batts |
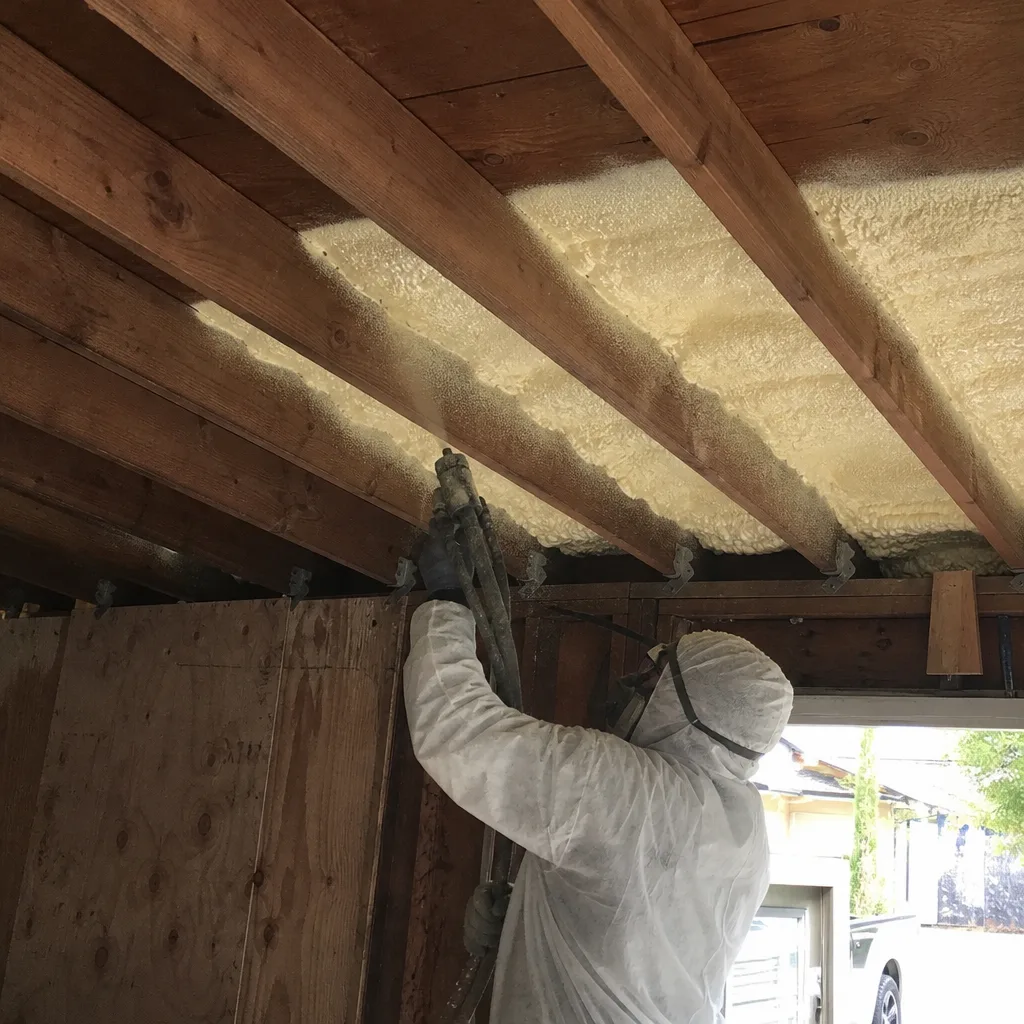
| Spray foam (open-cell) | $3.00 – $4.50 | Attic rooflines and rim joists | Air-seals while it insulates; highest performance per inch |
| Rockwool batts | $2.50 – $3.50 | Attics with moisture history | Naturally water-repellent and fire-resistant; excellent for San Jose tile roofs |
Fiberglass batts are the default choice for budget-driven jobs, but they’re the material most likely to underperform in San Jose’s damp winters. Blown cellulose is the best value for most attics: it fills completely, resists airflow, and holds its R-value better when humidity spikes. Spray foam is the top performer but costs meaningfully more, and it’s not always necessary for a standard vented attic; we use it selectively, usually for spray foam insulation in San Jose where air sealing and insulation need to happen in the same application. Rockwool is the specialist choice: if you’ve had moisture in your attic or you want the fire-resistance benefit, it’s worth the premium. You can’t go wrong with CertainTeed or Knauf fiberglass products if batts are the right call, but the material matters less than the installation quality and the air sealing behind it.
Air Sealing: The Step Most San Jose Contractors Skip
Air sealing is exactly what it sounds like: closing the small gaps and bypasses where air moves between your conditioned living space and the unconditioned attic or crawl space. Common leakage points include recessed can lights, plumbing vent stacks, wiring penetrations, the attic hatch, and interior wall top plates. In trade terms, a bypass is any opening that connects the living space to the attic cavity, and they’re the primary highway for both heat loss in winter and heat gain in summer.
Here’s the number that matters: unsealed bypasses reduce any insulation’s effectiveness by 30 to 40 percent. Insulation slows heat transfer through the material itself. It does almost nothing to stop air movement around and through it. If air can move freely through gaps in the attic floor, the insulation is doing maybe two-thirds of its labeled job. This is why two houses with identical R-38 insulation can have completely different comfort levels and energy bills: one was air-sealed first, the other wasn’t.
Most San Jose insulation bids do not include air sealing. It takes time, it requires crawling to every corner of the attic, and the materials are cheap enough that the labor is the whole line item. But skipping it is why so many homeowners spend $1,800 on new insulation and then can’t tell the difference in their upstairs bedroom. We won’t install insulation without addressing the major bypasses first, because we know from experience that half a job is worse than no job. It sets expectations that insulation can’t meet. If you’re getting competing bids, ask each contractor this directly: “Does your price include air sealing before insulation, or is it insulation only?” The answer tells you everything about how the job will actually perform.
R-Value Explained Without the Jargon
R-value is the number that measures how well insulation slows heat from moving through your ceiling, wall, or floor. Higher R-value equals more resistance to heat flow. R-38 slows heat more than R-19. That’s the whole concept.
The confusion comes from how R-values are achieved. R-38 in blown cellulose performs better in a real attic than R-38 in fiberglass batts, because cellulose fills the full cavity without the small gaps and compressed edges that batts always have. R-38 in spray foam performs better still, because the foam also stops air movement, which batts and cellulose only partially address. So when a contractor quotes you R-38, the question to ask is: R-38 of what, installed how, and after what kind of air sealing?
Here’s the R-value table that matters for San Jose:
- Attic: R-30 to R-49 recommended; R-38 is the sweet spot for cost versus performance in Zone 3C
- Walls: R-13 to R-15 for 2×4 framing; R-21 for 2×6 framing
- Crawl space: R-19 in the floor or on the crawl space walls if the crawl is unvented
- Floors over garage: R-30 in most San Jose homes with living space above a garage
One more thing: R-value declines when insulation gets damp or compressed. A 10-inch batt squashed into a 6-inch cavity delivers maybe R-11, no matter what the label says. That’s another reason installation quality matters as much as the product. This is where a company that shows you photo proof of the finished job, as the Laurel Attic Insulation San Jose home team does on every project, matters more than a lower number on a bid.
What Insulation Costs in San Jose in 2026
Let’s talk dollars. Most attic insulation jobs in San Jose run $900 to $2,400 depending on square footage and R-value needed. A typical 1,200-square-foot attic going from R-19 to R-38 with blown cellulose and standard air sealing lands around $1,500 to $2,000. Larger attics or homes with difficult access push toward the higher end.
Here’s a more detailed breakdown for San Jose pricing:
- Blown cellulose attic, 1,000 sq ft, R-38: $1,400 – $1,900
- Fiberglass batt attic, 1,000 sq ft, R-38: $1,100 – $1,600
- Spray foam attic roofline, 1,000 sq ft, R-21: $3,500 – $5,000
- Insulation removal (old, rodent-damaged, or moldy): $1 – $2 per sq ft, then new insulation on top
- Air sealing only, typical attic: $400 – $800
Removal changes the picture. If your existing insulation is saturated from a roof leak, filled with rodent droppings, or contaminated with mold, you need insulation removal in San Jose before anything new goes in. That’s a separate line item, and a contractor who quotes you new insulation without inspecting what’s already up there is giving you a number that won’t hold.
Rebates and financing shift these numbers too. Utility rebates for insulation upgrades have been inconsistent in recent years, but it’s worth checking current programs before you commit. A 365-day workmanship guarantee in writing is standard on every job we do, and it’s something you should ask every bidder about. If a contractor won’t put a guarantee in writing, that’s the cheapest job you shouldn’t take.
Three Questions to Ask Before Signing Any Insulation Contract
Most insulation problems are contract problems in disguise. The wrong material, a skipped air-sealing step, or a contractor who vanishes after the check clears all start with a bad agreement. Our How to Hire a Insulation Contractor in San Jose: A Step-by-Step Guide shows how to protect yourself.
Question 1: Does the price include air sealing?
Ask this exactly. “Does your written price include air sealing before insulation, and will you show me photos of the sealed bypasses before you install?” If the contractor hesitates, moves on, or says air sealing is unnecessary, move on yourself. Skipping it wastes 30 to 40 percent of the insulation’s performance, which means you’re paying full price for two-thirds of a job.
Question 2: Are you licensed with the CSLB, and can I verify it?
California requires insulation contractors to hold a C-2 license through the Contractors State License Board. Ask for the license number, then verify it at cslb.ca.gov. It takes 60 seconds. A contractor who won’t provide a license number or who gives you one that doesn’t match the business name is a hard pass. While you’re on the CSLB site, check for workers’ compensation insurance and any active complaints. San Jose has plenty of legitimate insulation contractors, so there’s no reason to take a risk.
Question 3: What R-value am I getting, of what material, installed how?
“R-38” alone isn’t an answer. R-38 of what? Blown cellulose, fiberglass batts, spray foam? Installed over what existing insulation, if any? Will the crew remove old material or install over it? Get the specifics in writing. The right answer for most San Jose attics is “R-38 of blown cellulose, installed after air sealing, with photos of the finished depth.” If the quote just says “attic insulation” and a dollar figure, ask for the breakdown or keep shopping.
One more practical note: get a written price before any work starts. Not an estimate, not a quote over the phone, but a written price delivered before the crew arrives. It’s our standard practice on every job, and it’s the single best protection against door-step surprises. A contractor who won’t put the price in writing before starting has already told you everything you need to know about how the rest of the job will go.
What to Check Yourself vs. What Needs a Pro
You can diagnose a lot from the ground. Here’s how to figure out whether you have an insulation problem before anyone gets on a ladder.
- Look at your ceiling from the living space. Do you see ghost lines, faint dark stripes along the joists? That’s dust collecting where the insulation is thin, a sign your attic floor is under-insulated. This is common in San Jose homes built in the 1960s and 70s, especially in Cambrian and Berryessa.
- Feel the temperature difference upstairs versus downstairs. On a hot summer afternoon, is your upstairs 8 to 10 degrees warmer than downstairs? In winter, are upstairs rooms cold while downstairs feels fine? That’s the classic symptom of an under-insulated attic, and it’s the most common complaint we hear in San Jose split-level homes.
- Check your attic hatch. If the hatch is uninsulated or doesn’t seal tightly, it’s a hole in your thermal envelope roughly the size of a two-foot-square window left open year-round. This is a five-minute fix for a professional, and it’s often the highest-ROI attic improvement available.
- Count your attic insulation depth. If you can access the attic safely, measure the depth of existing insulation. Less than 10 inches of fiberglass or 8 inches of cellulose likely means you’re under R-30, below the Zone 3C recommendation. If you see bare spots where insulation has settled or blown away from the eaves, the problem is worse than the depth suggests.
What you shouldn’t do yourself: crawl into a hot attic in July without protection, walk on joists without knowing where they are, or attempt to remove insulation that might be contaminated with rodent droppings or mold. Attic work in San Jose summers means surface temperatures above 130 degrees, and a fall through a ceiling is a hospital visit, not a DIY story. Same goes for spray foam: the application requires protective equipment and training. Leave the installation to people who do it every day. The spray foam insulation San Jose work we do always involves full protective gear and proper ventilation, because the chemicals involved are not something a weekend warrior should handle.
Common Mistakes to Avoid
- Skipping air sealing because “insulation is insulation.” Insulation without air sealing is like a wool sweater over a screen door. You’re paying for material that can’t do its job because air is moving right past it.
- Installing to old code minimums from the 1980s. R-19 in the attic was fine when energy was cheap and nobody cared about wildfire smoke. It’s inadequate now, and it’s the single most common insulation condition in San Jose homes built before 1990.
- Choosing fiberglass batts because they’re cheap, ignoring the moisture issue. San Jose’s wet winters mean fiberglass in a leaky attic picks up moisture and loses performance. It’s not wrong in every home, but it’s wrong often enough that it deserves a second thought.
- Not verifying CSLB licensing before signing. Unlicensed contractors are active in San Jose, and they’re often the ones with the lowest bids. Saving $500 on the front end is a bad trade when the guarantee isn’t worth the paper it isn’t printed on.
- Ignoring the attic hatch as a thermal hole. A uninsulated hatch can account for 5 to 10 percent of attic heat loss. It’s the cheapest fix in the whole system, and the one most overlooked on bids that focus only on square footage.
- Installing new insulation over rodent-contaminated or moldy old insulation. New fluffy stuff doesn’t fix what’s underneath. If there’s a sanitation issue, removal comes first. This is a health issue as much as a comfort one, especially in a San Jose winter when everything stews in the damp.
- Waiting for a roof leak to fix itself before insulating. It won’t, and the leak will destroy whatever you install. Fix the water problem first, then insulate. This is the order of operations, always.
When to Call a Professional
Call a pro when you can see bare spots in your attic insulation, when your upstairs is consistently 8 degrees hotter or colder than downstairs, when you’ve had a roof leak or rodent activity in the attic, or when you’re planning to sell and a home inspector flags under-insulation. Also call if you notice ice damming or heavy condensation on the underside of the roof deck in winter, or if wildfire smoke inside your home has been noticeably worse than in your neighbor’s house. These are all signs that your home’s thermal and air barrier has failed in a way that no amount of caulk from the hardware store will fix. Laurel Attic Insulation San Jose offers free estimates in San Jose, and we’ll tell you honestly whether you need work or whether your current setup is fine. Call (669) 333-7274.
Frequently Asked Questions
San Jose homes need R-30 to R-49 in the attic, R-13 to R-15 in walls, and R-19 in crawl spaces, according to DOE recommendations for IECC Climate Zone 3C. Most existing San Jose homes have less, often significantly less, so an upgrade to R-38 in the attic is the most common project. Call (669) 333-7274 for a free assessment.
Most attic insulation jobs in San Jose run $900 to $2,400 depending on square footage and R-value needed, with a typical 1,200-square-foot attic landing around $1,500 to $2,000 for blown cellulose to R-38. Spray foam costs more, removal costs extra, and air sealing is a separate line item that should always be included. Call (669) 333-7274 for a written quote.
You cannot meaningfully repair insulation. Once it’s compressed, damp, rodent-contaminated, or settled below its rated depth, the correct fix is removal and replacement, not patching. Adding new insulation on top of old but functional insulation is sometimes fine, but patching old insulation is a waste of money; replacement is the real fix.
Yes. Most attic insulation jobs in San Jose are completed in a single day, including air sealing and cleanup. Larger homes with removal needs or spray foam applications may run longer, but we’ll give you a written time frame before any work starts. Call (669) 333-7274 to schedule.
Blown cellulose at R-38 or higher handles San Jose’s summer radiant heat well because it fills the full cavity without the gaps batts leave behind. Spray foam performs even better but costs more. The material matters less than air sealing, which should happen first no matter what you choose.
Air sealing closes the bypasses that let smoke enter your home from the attic, including gaps around recessed lights, plumbing penetrations, and the attic hatch. Insulation alone does not stop smoke; it only slows heat transfer. A sealed attic is the most effective thing you can do to keep outdoor smoke out of your living space.
The Bottom Line
San Jose’s Climate Zone 3C is its own insulation category. The heat and moisture problems here don’t match Minneapolis or Atlanta, and the solutions shouldn’t either. The right insulation for San Jose is R-38 or better in the attic, installed after air sealing, using a material matched to your home’s specific moisture and accessibility profile. Costs run $900 to $2,400 for most attics, and the one step that makes or breaks the job is the air sealing most contractors skip. Verify licensing, get a written price before work starts, and make sure the guarantee is in writing. Call (669) 333-7274 for a free estimate from a team that shows you photo proof of everything we do.
Written by Chase Whitaker, Owner at Laurel Attic Insulation San Jose, serving San Jose since 2003.