
Last updated October 17, 2026
Seasonal Insulation Care for San Jose: Year-Round Homeowner’s Guide
San Jose averages only 15 inches of rain per year, but nearly 80% of that falls in a 90-day window from December through February – a concentrated moisture dump that hits attics, crawl spaces, and wall cavities all at once. Meanwhile, July surface temperatures on South Bay roofing materials routinely hit 160°F. Your insulation is doing two completely different jobs in the same calendar year, and most San Jose homeowners only ever prepare for one of them. This guide maps the actual weather calendar to what your insulation experiences month by month, so you can catch problems before they cost you real money. For a deeper dive, see The Complete Guide to Insulation in San Jose.
Quick Answer
Seasonal insulation care in San Jose means checking your attic for moisture damage in October before the winter rain window opens, monitoring for condensation and musty smells December through February, assessing for mold or compression in April after the rains stop, and verifying attic ventilation and radiant heat resistance June through September when roof temperatures spike. Most seasonal fixes cost between $300 and $2,400 depending on what you find, and the single most cost-effective upgrade in our market is sealing the crawl space vapor barrier before the first heavy rain. Use our Attic Insulation Maintenance Checklist for San Jose Homeowners to stay on track.
Table of Contents
- San Jose’s Weather Calendar: What Your Insulation Actually Goes Through
- October Pre-Rain Check: Vapor Barrier and Ventilation
- December Through February: Active Moisture Monitoring
- April Post-Rain Assessment: Mold, Compression, and Damage
- June Through September: Radiant Heat and Attic Ventilation
- Radiant Barriers in San Jose: What They Do and What They Cost
- Crawl Space Care: The $300 – $600 Fix Most Homes Need
- Before You Call a Pro: A Seasonal Self-Check Any Homeowner Can Do
- Common Mistakes to Avoid
- When to Call a Professional
- Frequently Asked Questions
- The Bottom Line
San Jose’s Weather Calendar: What Your Insulation Actually Goes Through
San Jose’s climate is Mediterranean, which sounds pleasant and mostly is – but it creates two distinct stress cycles that punish insulation in different ways. The winter cycle is about moisture. When the first atmospheric river arrives in December, it doesn’t just rain; it saturates the air for days at a time. Your attic’s relative humidity climbs, and any gap in your vapor barrier becomes a condensation point. The summer cycle is about heat. From June through September, your attic can reach 140°F to 160°F on a clear day, and that heat doesn’t just sit there – it radiates down through your ceiling into your living space, forcing your AC to work harder than it should.
Here’s the calendar we use when we walk a San Jose home:
- October: Pre-rain inspection window. Check vapor barriers, eave vents, and any exposed insulation before the moisture arrives.
- November: Transition month. First light rains begin. Watch for early condensation on ducts.
- December – February: Active moisture stress. This is when compressed fiberglass loses R-value fast and when mold begins if water gets trapped.
- March – April: Post-rain assessment. Check for dark staining, musty smells, and any insulation that has slumped or compressed.
- May: Shoulder month. Ideal time for upgrades or removal – mild temperatures make attic work comfortable for your installer and your home.
- June – September: Heat stress. Radiant heat from the roof deck tests your attic ventilation and makes spray foam or radiant barriers earn their keep.
One thing we tell every San Jose homeowner: the seasons here don’t announce themselves with drama like they do back east. No snow, no ice storms, no dramatic freeze-thaw cycle. But the damage is real – it just happens quietly. You’ll notice it first on your energy bill, then in a musty smell after the rains, then in a bedroom that won’t stay cool in August. By the time you notice it in comfort, the insulation has already lost a chunk of its R-value – that’s the number that measures how well insulation slows heat from moving through your ceiling.
October Pre-Rain Check: Vapor Barrier and Ventilation
October is the most important month for seasonal insulation care in San Jose, and it’s the one most homeowners skip. The logic is simple: once the rains start, your attic is harder to inspect safely, and any moisture that gets in stays in. A two-hour check in October can prevent a $3,000 insulation removal and replacement in March.
Here’s the October checklist we use, in order of priority:
- Check the vapor barrier. Look for tears, gaps, or areas where the plastic sheeting has pulled away from the framing. In San Jose’s winter humidity, a 6-inch tear is enough to let condensation form inside your insulation.
- Inspect eave vents. These are the small vents at the roof edge that let air flow through your attic. If they’re blocked by insulation, bird nests, or debris, your attic can’t dry out properly.
- Look at can lights. Recessed lighting fixtures generate heat and, if they’re not sealed properly, let moisture into the insulation around them. This is one of the most common hidden issues in San Jose homes built before 2000.
- Check bathroom exhaust fans. Make sure they vent all the way to the outside, not into the attic. An exhaust fan that dumps humid air into your attic is dumping moisture straight into your insulation every time someone showers.
- Feel for dampness on any exposed ducts. Cold ducts plus humid air equals condensation. If your ducts are sweating in October, they’ll be dripping by January.
If you find a problem in October, the fix is usually straightforward: seal the gap, replace the torn section of vapor barrier, or add a baffle to keep insulation from blocking the eave vent. These are repairs in the $150 to $500 range when caught early. The same problem caught in February, after water has saturated a section of fiberglass batts, can mean a full removal – and that’s a different conversation entirely. We cover Insulation Removal in San Jose in detail on that linked page, but the short version is that wet fiberglass loses its R-value permanently and needs to come out.
December Through February: Active Moisture Monitoring
Once the winter rain window opens, your job shifts from prevention to monitoring. You can’t prevent every moisture intrusion, especially in an older San Jose home with original attic framing. What you can do is catch moisture problems while they’re still small.
Three signs that winter moisture has already affected your insulation:
- Musty smell after the first heavy rain. This is the most reliable early signal. Mold begins growing in wet insulation within 48 to 72 hours when temperatures are in the 50s and 60s – exactly where San Jose sits from December through February. The smell comes before the visible staining.
- Visible condensation on cold ducts. If you can see water beading on ductwork in your attic, your attic’s dew point is being reached regularly. That water drips down onto whatever is below it, usually your insulation.
- Dark staining patterns on insulation batts near eave vents. This is where wind-driven rain enters most often. Look for gray or black discoloration on the top surface of your fiberglass batts near the roof edge.
If you spot any of these signs, don’t wait until spring. The damage compounds in wet conditions – what’s a $200 repair in January becomes a $2,000+ removal by April. And don’t make the mistake of thinking you can just let it dry out. Fiberglass insulation that’s been saturated loses its loft, and loft is what gives fiberglass its insulating power. Once compressed by water weight, it doesn’t bounce back.
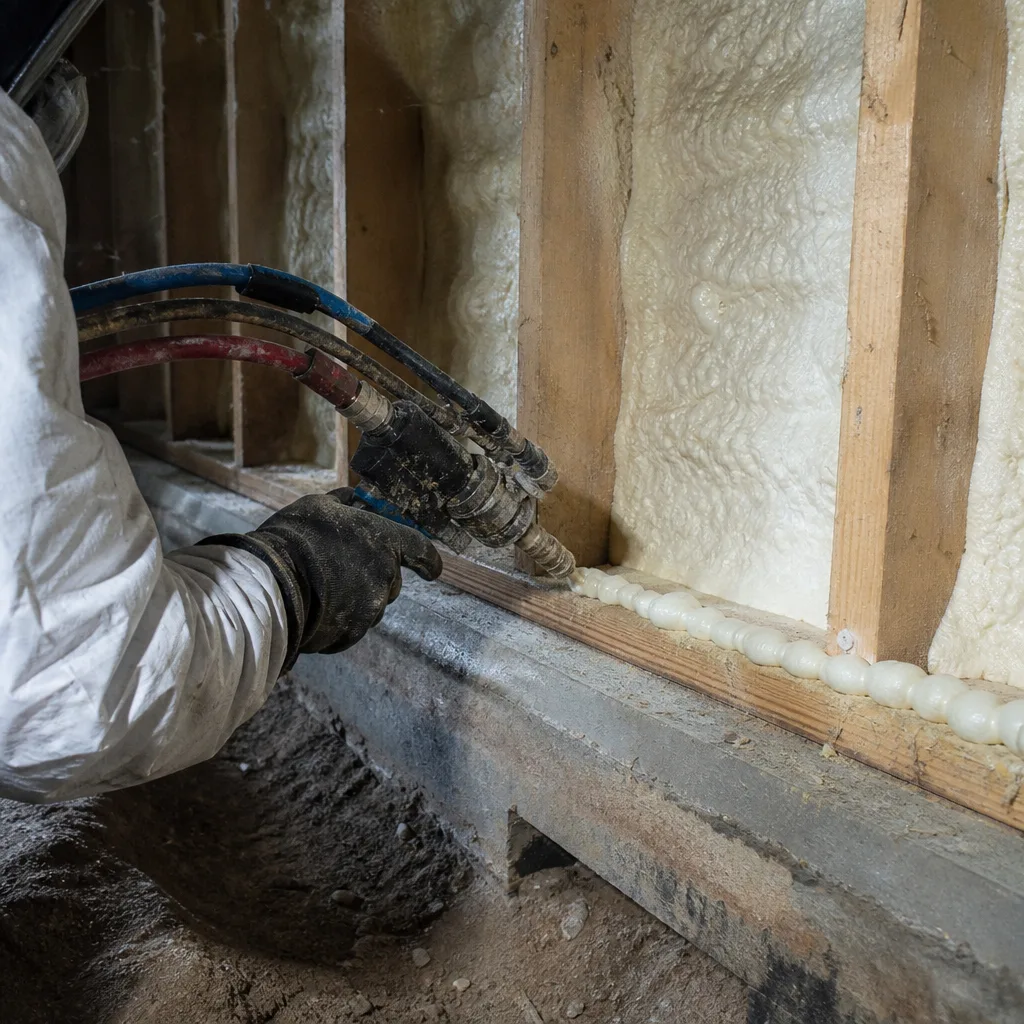
For homes with spray foam insulation, the winter story is different – and mostly better. Closed-cell spray foam, like the Icynene products we install, acts as a vapor barrier as well as an insulator. It doesn’t absorb water the way fiberglass does. That said, even spray foam needs inspection in winter, because trapped moisture against the roofline can still cause sheathing rot if there’s a leak. The material’s being water-resistant doesn’t mean you can ignore a leak.
April Post-Rain Assessment: Mold, Compression, and Damage
By April, the worst of San Jose’s rain is behind us and the attic has been through three months of sustained humidity. This is the month to do a thorough visual assessment of what the winter did to your insulation. The good news: April conditions are mild, so it’s a comfortable time to be in the attic or crawl space.
Here’s what to look for in the April walkthrough:
- Mold. Look for black, green, or gray speckling on the surface of your insulation, especially near eave vents and around recessed lights.
- Compression. Water-soaked insulation compresses under its own weight. What was once a 12-inch batt may now sit at 6 inches. That’s a permanent R-value loss of roughly 50%.
- Settling. Loose-fill insulation, including blown-in GreenFiber products, can settle over time and after humid winters. A settled section of attic floor might have an R-value of R-19 instead of the R-38 it started with.
- Pest activity. Rodents love a warm, dry attic in winter and early spring. Look for tunnels through blown-in insulation and nesting material.
If you find damage in April, you have options. A small section of stained batt insulation can sometimes be removed and replaced without redoing the whole attic. A compressed or moldy section requires removal – there’s no cleaning or drying moldy fiberglass; it comes out. For spray foam, the assessment is simpler: if the foam has adhered properly and there’s no sheathing rot behind it, you’re in the clear. Spray foam doesn’t compress the way fiberglass does.
One San Jose-specific point: because our rain is so concentrated, a single big storm season can saturate homes that went through the previous five winters completely dry. A homeowner who skipped inspection in 2024 because 2023 was dry could find significant damage in April 2025. Don’t judge this year by last year – the arithmetic doesn’t work that way in our climate.
June Through September: Radiant Heat and Attic Ventilation
When San Jose roofs hit 160°F in July, your attic becomes a radiant heater pointed directly at your ceiling. This is the second seasonal cycle – the one that costs you money through your AC bill instead of through moisture damage.
Here’s what actually happens in a hot attic. The roof deck absorbs solar radiation and heats up. That heat radiates down into the attic air and onto the top surface of your insulation. Your insulation slows the conductive transfer of that heat down into your living space, but it can only do so much. When the attic air is 140°F, even good insulation lets some heat through – because it’s still 70 degrees hotter above your ceiling than below it.
The key factor in the summer cycle is ventilation. A properly vented attic moves hot air out and pulls cooler air in through eave vents. The goal is to keep the attic air temperature as close to the outside air temperature as possible. An unvented or under-vented attic can run 30 to 40 degrees hotter than the outside air, and that’s when you notice it in the rooms directly below the attic floor, usually the upstairs bedrooms.
Your June-through-September checklist:
- Verify airflow through eave vents. Use a piece of tissue paper held near the vent – it should move when the attic is hot, indicating air is actually circulating.
- Check the attic fan if you have one. A powered attic fan that’s broken or undersized is doing nothing. A working one should kick on when the attic hits around 100°F.
- Feel the ceiling in the hottest room. Walk upstairs at 3 PM on a hot day and put your hand on the ceiling. If it feels noticeably warmer than the walls, heat is getting through your insulation, and the fix is either more insulation, a radiant barrier, or both.
- Check your R-value. In San Jose’s climate zone (which is Zone 3 under the California Energy Code), the minimum recommended attic insulation is R-38. Many homes built before 2000 have R-19 or less, and that’s a measurable energy penalty in summer.
Radiant Barriers in San Jose: What They Do and What They Cost
If your attic is properly insulated but still scorching in summer, the next tool on the table is a radiant barrier. This is a reflective foil layer – usually an aluminum-faced product – installed under the roof deck. It reflects radiant heat back toward the roof instead of letting it radiate down into your attic air and insulation.
Here’s the honest breakdown for San Jose homeowners:
- What it is: A thin, reflective material (looks like foil) stapled to the underside of your roof rafters. It doesn’t insulate in the conductive sense; it reflects radiant heat.
- What it costs: $0.25 to $0.75 per square foot installed, depending on the material and whether your attic is easy to access or has a lot of obstructions. For a typical 1,500-square-foot attic, that’s $375 to $1,125.
- What it actually does: Testing from the Department of Energy and independent labs shows a radiant barrier can reduce attic heat gain by up to 25% when installed correctly and combined with good ventilation. We’re careful with that number – it’s the maximum under ideal conditions, not a blanket promise. But a 15% to 25% reduction in attic heat load is real, and you’ll feel it in rooms that bake in the afternoon.
The radiant barrier is a San Jose-specific tool in a way it’s not for, say, a coastal home in Pacifica. Our inland summer heat and dry air mean the radiant heat component is dominant. Coastal humidity changes the math entirely. In San Jose, the combination of R-38 insulation plus a radiant barrier is genuinely the most effective summer strategy for existing homes.
One more thing: a radiant barrier is not a substitute for insulation. They address different mechanisms. Insulation slows conductive heat transfer; a radiant barrier reflects radiant heat. You need both for a truly comfortable attic in San Jose’s June-through-September window.
Crawl Space Care: The $300 – $600 Fix Most Homes Need
We’ve been talking mostly about attics, but the crawl space is where winter moisture does its sneakiest work in San Jose. The city’s winter rains elevate soil moisture – particularly in older pier-and-beam homes, which are common in neighborhoods like Willow Glen, Rose Garden, and the Naglee Park area. When the soil under your house gets wet, moisture migrates up into the crawl space air, and from there into your floor framing and, eventually, your living space and walls.
The single most cost-effective seasonal fix in this category is a crawl space vapor barrier – a thick plastic sheet laid over the soil to block moisture migration. In San Jose’s market, that runs $300 to $600 for a typical residential crawl space, depending on access and square footage.
The signs that your crawl space needs attention:
- Musty smell coming from the floor. Not from the attic – from the floor level. This is the classic sign of crawl space moisture.
- Cupping or warping hardwood floors. Moisture from below causes wood to expand unevenly, especially in the winter.
- Visible standing water or dark, soggy soil under the house. After heavy rain, this is the give-away. If your crawl space has puddles in February, the vapor barrier either doesn’t exist or has failed.
- Condensation on crawl space ductwork. Same physics as the attic – cold ducts plus humid air equals water.
An unsealed crawl space also costs you thermal performance year-round. Warm air rises out of your attic in winter while cool air gets pulled up through gaps in your floors from the crawl space. It’s a passive cycle that works against your HVAC system 12 months a year. Sealing the vapor barrier is a $300 to $600 fix that improves both the moisture situation and the thermal envelope – a rare two-for-one in home improvement.
Before You Call a Pro: A Seasonal Self-Check Any Homeowner Can Do
You don’t need to be an insulation contractor to gather useful information about your home’s condition. Here’s a sensory self-check you can do in any season, using nothing more than your nose, a flashlight, and your phone.
What to smell for
The most reliable diagnostic tool you own is your nose. Go to the attic access and sniff before you go up. In the winter, a musty or earthy smell means moisture has gotten into the insulation. In the summer, a hot, dusty smell is normal – but a burnt or acrid smell isn’t. Musty in any season is a red flag that needs professional investigation.
Where to point a flashlight
Shine a light along the eaves first, that’s where wind-driven rain enters. Then check the area around recessed lights and bathroom fan housings. Then the center of the attic floor. These are the three zones where moisture damage, settling, and pest activity show up first. Look for dark discoloration, sags in the insulation layer, or tunnels where rodents have burrowed.
What a thermal camera app can and cannot do
There are smartphone thermal camera attachments (FLIR makes one that plugs into your phone) that cost $200 to $400 and can give you a useful picture of hot and cold spots on your ceiling. What they can do: show you where heat is penetrating through your ceiling on a hot day, identify cold spots in winter that suggest air leaks, and help you see whether your insulation is distributed evenly. What they cannot do: diagnose the cause of the problem, measure R-value, or tell you whether your insulation is wet. A thermal camera shows you where a problem is, not what it is. If the scan shows a large temperature variation across your ceiling, that’s your signal to call a professional.
One more note on DIY: if you go into your attic, please step only on the framing members, not on the drywall, and wear a dust mask. Not sure whether to tackle it yourself? Read our DIY vs Professional Insulation: The San Jose Homeowner’s Decision Guide. Loose-fill insulation contains fine particulates you don’t want in your lungs. And if you see anything electrical that looks questionable, that’s a hard stop – don’t touch it, don’t work around it, call someone.
Common Mistakes to Avoid
- Sealing attic ventilation to save energy. Closing or blocking eave vents because you think it’ll keep warm air in during winter is a mistake that traps moisture and creates condensation. In San Jose’s winter humidity, that means mold by February.
- Adding insulation on top of wet insulation. You cannot fix a moisture problem by burying it under more fiberglass. The old, wet material has to come out first. We’ve seen homeowners spend money on new blown-in insulation only to have the whole thing fail because the existing layer was compromised.
- Ignoring the bathroom exhaust fan. If your bathroom fan vents into the attic, every shower dumps moisture straight into your insulation. It’s the most common hidden deficiency in San Jose homes built between 1970 and 2000.
- Assuming R-value means “good enough.” The minimum code for San Jose’s climate zone is R-38 in the attic, but many older homes sit at R-19 or less. Even in a mild city like ours, that gap costs you real money on both heating and cooling.
- Checking only once per year. A single inspection in spring or fall isn’t enough. The October pre-rain check and the April post-rain assessment are different tasks with different goals. Skipping one or the other means you’re only protecting against half the seasonal cycle.
- Thinking spray foam means zero maintenance. Spray foam is durable and moisture-resistant, but it’s not magic. You still need to check for roof leaks and sheathing rot behind the foam, especially after a wet winter.
- DIY-ing a crawl space encapsulation without moisture awareness. Laying a vapor barrier seems simple, but if you don’t address grading and drainage around the foundation, you’re trapping water instead of blocking it. A pro assessment costs nothing when you’re getting an estimate, and it’s worth it.
When to Call a Professional
Some situations call for a professional’s eyes, tools, and access to materials that aren’t at Home Depot. If you find mold on your insulation, you need removal – there’s no home remedy. If your insulation is compressed or saturated, it needs to come out and be replaced. If your attic consistently runs 30+ degrees hotter than the outside air in summer, you have a ventilation problem that requires diagnostic work. If you can see daylight through your attic floor, your air sealing is failing, and you’re paying to heat and cool San Jose’s climate directly. And if you have knob-and-tube wiring anywhere in the attic, do not attempt any insulation work at all until an electrician has looked at it. Attic Insulation in San Jose is our core service and we’re happy to walk a San Jose home and give you a straight answer about what’s needed and what isn’t. Laurel Attic Insulation San Jose offers free estimates in San Jose – call (669) 333-7274 – and every estimate includes a written price before any work starts.
Frequently Asked Questions
Most seasonal fixes run between $300 and $600 for tasks like sealing a torn vapor barrier, adding baffles to blocked eave vents, or installing a crawl space vapor barrier. Larger corrections, like removing and replacing saturated insulation, run $1,500 to $4,000+ depending on attic square footage. Call (669) 333-7274 for an exact quote – estimates are free.
Twice a year at minimum: once in October before the winter rain window opens, and once in April after the rains have stopped. Each visit has a different purpose, and skipping either one leaves a seasonal risk unaddressed.
Yes, with basic caution. You can smell for mustiness, shine a flashlight along the eaves and around recessed lights, check for visible staining or compression, and use a thermal camera attachment on your phone to find hot and cold spots. What you can’t diagnose yourself is the cause of those hot spots, the R-value of your insulation, or whether your insulation is wet – those require professional tools and experience.
May and October are ideal. Both months are mild enough for comfortable attic work, and they bookend the two stress seasons. Replacing insulation in October means you go into the winter with a clean, dry, properly vented attic. Replacing in May means you’re ready for summer’s heat load.
Yes, in one important way: closed-cell spray foam, like the Icynene products we install, acts as a vapor barrier as well as an insulator. It doesn’t absorb water or compress the way fiberglass does. But spray foam still needs a leak check after a wet winter, because trapped moisture against the roof sheathing can cause rot even when the foam itself stays dry.
$0.25 to $0.75 per square foot installed, which is $375 to $1,125 for a typical 1,500-square-foot attic. It reduces attic heat gain by up to 25% when combined with proper ventilation and R-38 insulation, though results vary by home. Call (669) 333-7274 for a written estimate specific to your attic.
The Bottom Line
San Jose’s seasons are subtle, but they’re real – and they create two completely different stress cycles for your insulation. The winter cycle is about moisture: concentrated rain, high attic humidity, and condensation that compresses and molds fiberglass. The summer cycle is about radiant heat: 160°F roof decks pushing heat down through your ceiling. A homeowner who checks in October and April, seals the crawl space before the first rain, and adds a radiant barrier if the summer heat load is high has addressed the full calendar. Most seasonal fixes cost $300 to $600 when caught early. The expensive version of the same problem is a full removal. Two inspections a year, a written price before any work starts, and a pro who’ll answer the phone when you call – that’s the whole game. For more guides & resources, visit our blog.
Written by Chase Whitaker, Owner at Laurel Attic Insulation San Jose, serving San Jose since 2003.